Getting Started With YouTube Video Creation on Your Phone
The rise of smartphones has revolutionized the way we create and consume content. With a powerful camera in your pocket, you’re armed with all you need to start your YouTube video creation journey. The initial step is to familiarize yourself with your phone’s camera capabilities. Modern smartphones have high-definition cameras that can record in 1080p or even 4K resolution, making them suitable for creating high-quality YouTube videos. Spend some time understanding settings such as frame rate, exposure, and focus options, which are critical for enhancing the visual appeal of your content.
Consider stability and composition once you’ve grasped your device’s camera features. Shaky footage can distract viewers, so investing in a basic tripod or a handheld gimbal can significantly improve the professionalism of your videos. Moreover, apply the rule of thirds to compose your shots and play with angles and perspectives to keep your audience engaged. Additionally, ample natural lighting can make a huge difference in video quality – always aim to film in well-lit conditions where your phone’s sensor can best capture the visuals.
Essential Apps for Video Editing on Phones
Creating a YouTube video doesn’t end with recording; editing is where your story comes to life. Several powerful video editing apps are available for iOS and Android devices. Apps like Adobe Premiere Rush, iMovie (for iOS), and KineMaster offer extensive editing tools on mobile platforms. You can trim clips, add transitions, work with audio, and even incorporate graphics and text overlays, all from the comfort of your phone. Using these tools effectively can elevate your video’s production value and overall viewer experience.
Essential Equipment and Setup for Filming on Your Phone
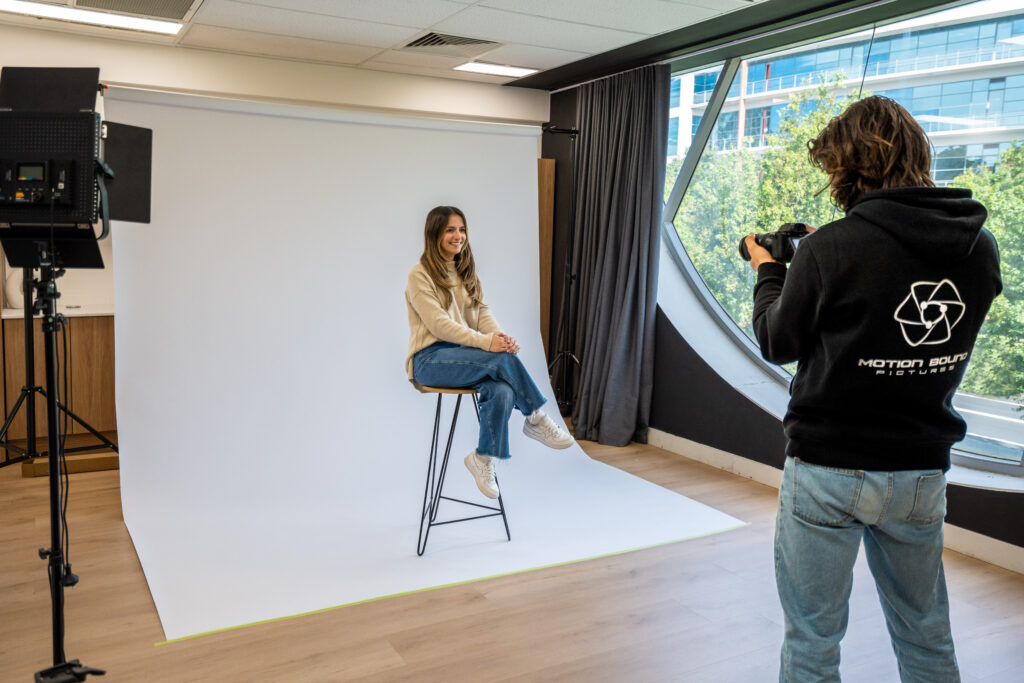
Filming on your phone doesn’t mean sacrificing the quality of your content. With the right equipment and setup, you can capture high-quality videos ready to impress your audience. The essential gear you’ll need extends beyond your smartphone; consider investing in key accessories to elevate your production value.
Stabilizing Tools
Stability is crucial when filming. Shaky footage can be distracting and sometimes even professionally unacceptable. Investing in a good smartphone stabilizer or gimbal will make a significant difference. These handheld devices keep your phone steady even as you move around. Some gimbals have additional features like follow modes that help keep the subject focused while introducing dynamic motion in your shots.
Audio Equipment
Audio quality is one of the most overlooked aspects of filming with a phone. Your phone’s built-in microphone won’t cut it if you’re looking for professional-grade sound. Luckily, there are a variety of external microphones designed specifically for smartphones. Whether you opt for a Lavalier mic that clips onto clothing or a shotgun mic that mounts on top of your phone, crisp audio will significantly enhance your video content’s overall impact.
Lighting Solutions
Good lighting can make or break your video. Natural light is always best, but it’s only sometimes available or consistent. This is where portable and adjustable light sources, like ring lights or LED panels, become vital. These lighting solutions directly provide the right amount of light on the subject, which can help avoid grainy footage and ensure that colors pop. Adjustable settings mean you can adapt to various environments and times of day, giving you flexibility in your filming schedule.
Step-by-Step Guide to Recording Your First YouTube Video on Your Phone
[aib_post_related url=’/elementor-1483/’ title=’Everlast’ relatedtext=’You may also be interested in:’]
Creating your first YouTube video with just your phone is an accessible and exciting venture. Today’s smartphones have high-quality cameras that capture crisp and clear video content. Before you begin, ensure your phone’s camera settings are optimized for the best video quality, typically found in your phone’s camera app settings. A high frame rate, such as 60 frames per second, is recommended for smoother footage, especially if you plan to capture fast-moving subjects or add slow-motion effects in post-production.
Once you’ve dialed in your settings, it’s time to frame your shot. Pay attention to composition and lighting to make your video visually appealing. Use the rule of thirds by aligning your subject along the grid lines that many phone camera apps provide. Good lighting is essential for high-quality video—natural light is your best friend for recording videos during the day. If you’re indoors or recording at night, consider additional lighting sources to avoid grainy or underexposed footage. A simple ring light or a desk lamp can greatly enhance the video quality.
Audio quality is just as important as video. While your phone’s built-in microphone can capture sound, it could be better for YouTube videos and can pick up a lot of background noise. Invest in a lavalier or standalone microphone compatible with your phone to improve audio clarity. Also, ensure you record in a quiet environment to minimize distractions for your viewers. Remember, great audio can keep an audience engaged even if the video quality is not top-notch.
Finally, when you hit that record button, remember to be yourself and convey your message. Keep your video focused and on-topic to retain viewer interest. If you make a mistake, don’t worry—you can always pause and resume or use simple editing apps to cut out errors later. As you become more comfortable in front of the camera, your unique personality will shine through, and recording videos will become second nature.
Editing Your Phone Video for YouTube: Tips and Best Practices
Video editing is crucial in shaping your content to resonate with your YouTube audience. With most smartphones now boasting high-quality cameras, creating content from your phone has always been challenging. However, a great video is about more than just the footage but the polished finish. Ensure you have strong beginning and end points to maintain viewer interest throughout your video. An engaging introduction is paramount; consider adding a teaser of the most exciting moment to hook viewers early.
Audio quality is as significant as your video clarity. Background noise can be a major distraction, so use audio editing tools to minimize unwanted sounds. Enhance your voice clarity and consider adding a soundtrack that complements your content to keep the viewer engaged. Pay close attention to the volume levels of your clips to maintain consistency, ensuring one section isn’t significantly louder than another.
[aib_post_related url=’/the-five-essential-drone-shots-for-real-estate-video/’ title=’The Five Essential Drone Shots for Real Estate Video’ relatedtext=’You may also be interested in:’]
Regarding the visual aspect, trimming and cutting clips can greatly improve the overall flow of your video. Keep your transitions smooth and not overly complicated; a simple crossfade or a swipe can be more effective than a cluttered or flashy transition. Utilize your phone’s built-in editing tools or third-party apps to eliminate redundant sections, keeping your content concise and direct. Remember, each frame should add value to your narrative or message.
Finally, use text and graphics wisely to emphasize key points or add additional information. However, it’s important not to overdo them. Subtitles can be significant if your audience enjoys watching videos without sound. Balance is key; graphics should enhance, not overshadow, your content. Always preview your edits on multiple devices to ensure they look clean and professional. By following these tips and best practices, your phone-produced YouTube video can stand out and attract the attention of your intended audience.
[aib_post_related url=’/elementor-1476/’ title=’Jimeoin’ relatedtext=’You may also be interested in:’]
Uploading and Optimizing Your Phone Video for YouTube Success
With an ever-increasing number of creators contributing content to YouTube daily, standing out in the vast sea of videos requires more than great content. It also necessitates smart uploading and optimization strategies, particularly for videos shot on mobile phones. The portability and convenience of smartphone cameras have turned them into the go-to option for budding videographers. However, understanding the nuances of the YouTube platform is key to truly capitalizing on the power of mobile-shot footage.
Choosing the Right Format and Resolution
Before you upload your video to YouTube, it’s important to ensure that your video is in a compatible format supported by the platform. Most smartphones today record in MP4 format, which YouTube widely accepts. Also, remember that resolution matters. While 4K video is gaining popularity, full HD (1080p) remains a reliable resolution that balances quality and file size, making it accessible to a wide range of viewers with varying internet speeds.
Improving Visibility with Metadata
Once your video is ready to be uploaded, focus on metadata: your video’s title, description, and tags. These are crucial as they directly impact your video’s discoverability. A catchy, descriptive title incorporating relevant keywords can significantly boost your video’s visibility. In crafting your description, include a concise overview of the video’s content, followed by more detailed information, such as timestamps, resources, or other valuable links. Properly tagging your video with relevant keywords helps YouTube understand the content and context of your video, thus aiding in serving it to the appropriate audience.
Thumbnails and Engagement
Be aware of the power of a compelling thumbnail. This small image can be the deciding factor for a viewer choosing your video over another. Creating a custom thumbnail that teases the content of your video, contains elements of your branding, and includes text overlays for further context can drastically improve your click-through rates. After your video goes live, actively engaging with your viewers through comments, likes, and sharing can encourage ongoing interaction, which is favored by YouTube’s algorithms, potentially increasing your video’s reach and ranking.


