Step 1: Define Your Video Goals and Target Audience
Establishing Clear Video Objectives
Before you roll the camera, you must articulate your goal with your video content. Whether your objective is to increase brand awareness, drive website traffic, or generate leads, defining clear and measurable goals will guide your video strategy. For instance, if lead generation is your prerogative, you might measure success by the number of viewers who fill out a contact form after watching your video. Understanding your key performance indicators (KPIs) upfront will streamline the process of strategizing your video’s content, style, and call-to-action.
Identifying Your Target Audience
Knowing your target audience is as crucial as setting your video goals. Who are you creating this video for? What are their interests? What problem does your video seek to solve for them? These questions are vital in crafting a message that resonates with them. Create a target audience persona to help visualize the ideal viewer. This might include demographics such as age, gender, occupation, or any other relevant information that helps tailor your video content to their preferences and lifestyles.
It’s important to consider where your audience spends their time online. Different platforms cater to distinct demographics and consumption patterns, so your video’s hosting platform should reflect your target audience’s habits. Are they more likely to engage with video content on Facebook, YouTube, or Instagram? Or do they prefer professional platforms like LinkedIn? Matching your video’s platform with your audience’s preferences will considerably increase the potential for viewer engagement and goal attainment.
Aligning Your Goals with Audience Needs
Finally, aligning your video goals with the needs of your target audience ensures that your content will not only reach the right eyes but also strike a chord with them. This requires a deep dive into understanding your audience’s challenges and how your product or service can meet their needs. When your video content addresses these points effectively, it becomes a powerful tool in moving your audience through the conversion funnel, nurturing them from awareness to action. Remember, content that yields value to your audience is more likely to encourage shares and foster the engagement necessary to meet your video objectives.
Step 2: Write a Compelling Script and Storyboard
Creating an engaging script is pivotal to capturing your audience’s attention. Here, the narrative takes shape, compelling your viewers to follow along. Start by clearly defining the purpose of your content: are you informing, entertaining, convincing, or teaching? Your goals will dictate your script’s tone, style, and structure. Keep your language conversational to resonate with viewers, as if you’re speaking directly to them. This intimate approach often yields a more powerful connection than a sterile, formal tone.
Scripting for Your Target Audience
Understanding your audience is crucial. Tailor your script to their interests, problems, and desires. Identify the keywords they might use to search for your content and weave them naturally into your script. This boosts SEO and ensures that your content feels tailor-made for your audience. Moreover, the narrative should take viewers on a journey – from presenting a problem or question to offering a resolution or answer. Remember, every sentence in your script should serve a purpose: to educate, engage, or elicit emotion.
Crafting a Visual Narrative: The Storyboard
A storyboard visually guides the production process, illustrating how your script unfolds scene by scene. It’s a critical tool for pre-visualizing the pacing of your narrative. Begin by sketching the key scenes corresponding to your script’s important moments. This doesn’t require high artistic skills, just a clear representation of camera angles, transitions, and compositions. A well-thought-out storyboard will ensure that the visual elements complement the verbal narrative, adding depth and clarity to your message.
A storyboard in the planning phase can uncover potential issues before production begins, saving time and resources. Each frame of your storyboard represents a building block of your story, so take the time to consider how visuals will reinforce the script’s messages. Use bold contrasts, dynamic shots, and relevant imagery to create powerful scenes that linger in your viewers’ memories. Remember, a compelling script paired with an illustrative storyboard is the blueprint for a successful video that can effectively captivate and inform your audience.
Step 3: Organize Your Production Setup
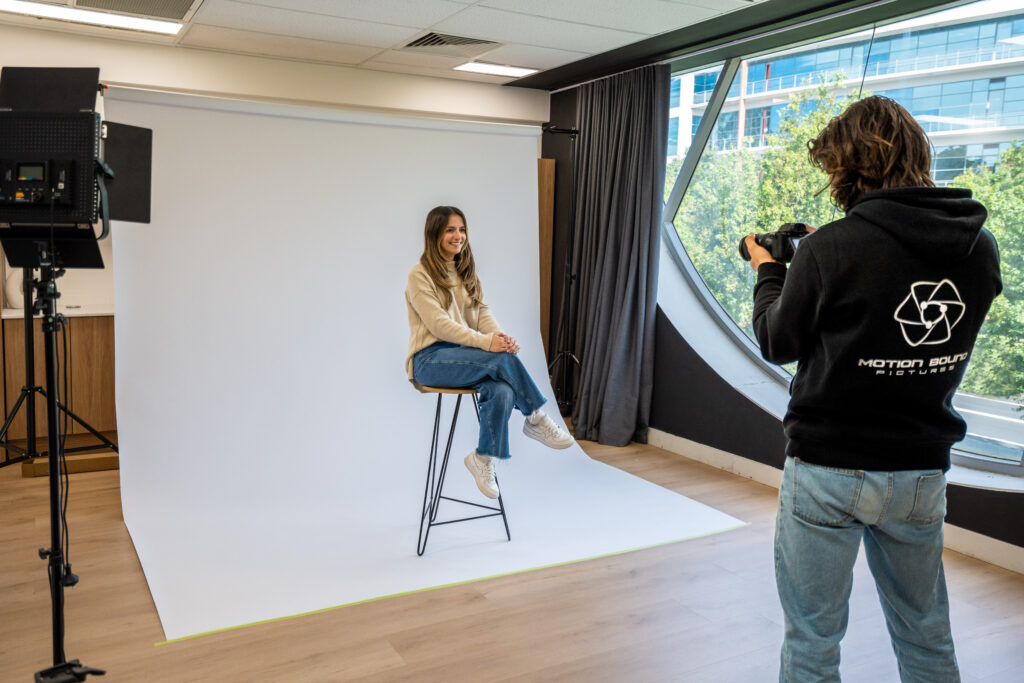
When preparing to transform a space into a production-ready environment, one must consider not only the technical requirements but also the practical workflow of the production process. It is key to consider how each aspect of your production setup will interact with others and how it contributes to creating a seamless work environment.
Equipment placement is critical. Ensure that your camera, lighting, and sound gear are positioned strategically. It’s generally best practice to set up lighting fixtures before positioning your camera to accommodate the best possible lighting angles and diffusion. Similarly, microphones should be placed where they can best capture your subject without interfering with the camera or lighting setups.
Next, cable management is vital in preventing accidents and maintaining an organized workspace. Loose cables pose a tripping hazard and can disrupt your production if they become unplugged or damaged. Investing in cable ties and duct tape to secure cables along floors, walls, and stands can save time, prevent accidents, and maintain the aesthetic cleanliness of your production space.
Something often overlooked in production setup is the comfort and accessibility of the crew. Elements such as ample space for movement, quick access to essential equipment, and stations for tasks such as battery charging and data backup facilitate a smoother workflow and help ensure that the team stays focused and efficient throughout the production. After all, an organized set reflects the professionalism and dedication to the craft of all those involved in the project.
Step 4: Film and Direct Your Video Content
Once your pre-production phase is neatly wrapped up, it’s time to hit the record button. Filming and directing your video content requires a keen eye for detail and a steady hand. Whether you’re using high-end equipment or a basic smartphone camera, fundamental principles apply: ensure your lighting is flattering, your audio clear, and your subject matter in sharp focus.
Remember that the director’s role is pivotal as you set out to film. Directing is not only about calling the shots on set; it’s about bringing the story to life, guiding your actors or subjects, and ensuring that each frame aligns with the storyboard you designed during the planning stages. If you’re on camera, self-direction requires mindfulness about your body language and delivery. Consistency in your takes is key—it will make the editing process more streamlined.
Utilize the power of diverse shots to keep your viewers engaged. Mix wide shots, medium shots, and close-ups to add visual interest and depth to your storytelling. Pay attention to the composition of each shot, adhering to the rule of thirds where possible to create a balanced and aesthetically pleasing scene. Monitor every clip for unwanted background noise or visual distractions that could detract from the content’s main message.
Lastly, be prepared to adapt. Even the most meticulously planned shoots encounter unforeseen challenges—a change in the weather, a technical fault, or an impromptu moment that enhances your narrative. Embrace these as part of the creative journey. Stay focused, patient, and energized throughout the filmmaking process, as your demeanor will set the tone for the entire production. Keep the footage rolling and the ideas flowing, and capture the essence of your narrative with each take.
Step 5: Edit, Optimize, and Publish Your Video
Once you have your video footage in the can, the next crucial step is to dive into the editing suite. A good edit can transform your raw content into a captivating story and enhance the viewer experience. Start by trimming any extraneous footage and select only the most compelling shots. Remember to consider the narrative flow and pace of the video, ensuring it keeps the viewers engaged from start to finish. Editing is where you can get creative with transitions, effects, and graphics to add a professional finish to your video. Remember, your objective is to create a seamless and visually appealing piece that will hold your audience’s attention.
Optimizing your video is another key step that should be noticed. This process includes selecting the right file format, compressing the video for faster uploads, and adjusting the resolution to meet the requirements of the platforms you choose for publishing. Consider adding subtitles for greater accessibility and to boost SEO, as well. Keywords are important in your video’s title and description to ensure it is discoverable by search engines. Meta descriptions, tags, and a catchy thumbnail also make your video easy to find and inviting to potential viewers.
[aib_post_related url=’/the-five-essential-drone-shots-for-real-estate-video/’ title=’The Five Essential Drone Shots for Real Estate Video’ relatedtext=’You may also be interested in:’]
With the editing and optimization boxes ticked off, it’s time to publish your video. Choose your platform wisely—be it YouTube, Vimeo, or within your website—each has its advantages and audience. Once published, don’t just wait for views to roll in. Be proactive and share your video across social media channels, embed it in relevant blog posts, and consider utilizing email marketing to spread the word. For those on YouTube, leverage the platform’s functionality by adding cards and end screens to promote other content or direct viewers to your website, enhancing engagement and viewer retention.
